Fixing your inflatable kayak quickly is essential, but ensuring the repair is strong and long-lasting is equally important. So, does heat gun speed up adhesive cure time inflatable kayak repairs? It’s not as simple as you think.
In this article, we’ll explore how heat guns affect certain adhesives used in kayak repairs. By the end, you’ll understand whether using a heat gun is a good or bad idea for fixing your kayak effectively.
Key Takeaways
- Adhesives in inflatable kayaks dry in a few hours to 2-3 days, based on the type and temperature.
- Warming most adhesives a bit can help them dry faster, but too much heat can ruin the bond.
- A heat gun can make adhesives dry much quicker for kayak repairs.
- It’s important to control the heat when using a gun to prevent overheating the adhesive or kayak material.
- Heat guns can make adhesives work better and dry faster, leading to quicker and more effective kayak repairs.
Table of Contents
Understanding Adhesive Curing for Inflatable Kayaks
Fixing or keeping inflatable kayaks strong is key. Curing adhesive is a must to keep your kayak safe. Let’s explore how to cure adhesive for inflatable kayaks and what matters most.
Types of Adhesives Used
Inflatable kayaks need special adhesives. These are called inflatable boat glue or marine-grade epoxy. They make a strong bond that lasts through paddling and weather. Choosing the right glue is very important for fixing and keeping kayaks.
Curing Time
Adhesive curing times vary. They can take a few hours to 2-3 days. This depends on the material and temperature. It’s vital to cure the adhesive fully to avoid weak spots.
Key Factors
- Cleanliness of the application surface: Make sure the area is clean and free of grease for best adhesion.
- Specificity of the adhesive: Use glue made for inflatable kayak materials for a strong bond.
- Curing time: Follow the maker’s curing time for lasting repairs.
- Fabric and glue bond power: The right match between kayak fabric and adhesive is crucial for a strong fix.
Knowing these factors is key for fixing and keeping your inflatable kayak in good shape. By using the right adhesives and following best practices, your kayak will last longer and stay safe on the water.
“Proper adhesive curing is the difference between a temporary fix and a long-lasting solution for your inflatable kayak.”
The Role of Temperature in Adhesive Curing
Temperature is very important for fixing inflatable kayaks. Most adhesives work better when they’re a bit warm. But, it’s key to know the right temperature and avoid too much heat.
Temperature’s Impact
Getting the temperature right is crucial for fixing adhesives. A little warmth can make the bond stronger and last longer. This is especially true for fixing inflatable kayaks, where a strong seal is vital.
Ideal Conditions
The best conditions for fixing inflatable kayak adhesives are warm and dry. This helps the adhesive set well and stick for a long time. Keeping the temperature between 70-90°F (21-32°C) can make the repair faster and stronger.
Risks of Overheating
While heat can speed up curing, too much can harm some adhesives. Overheating can make adhesives like super glue lose their stickiness. It can also cause the adhesive to bubble up, leading to leaks and a weaker repair.
| Adhesive Type | Ideal Curing Temperature | Risks of Overheating |
|---|---|---|
| Heat Curing Adhesives | 70-90°F (21-32°C) | Loss of stickiness, bubbling, and compromised bond strength |
| Thermal Activated Adhesives | 70-90°F (21-32°C) | Loss of stickiness, bubbling, and compromised bond strength |
| Super Glue and Krazy Glue | 70-90°F (21-32°C) | Loss of stickiness and compromised bond strength |
Knowing how temperature affects adhesive curing is key. Following the recommended conditions can lead to a successful and lasting repair for your inflatable kayak.
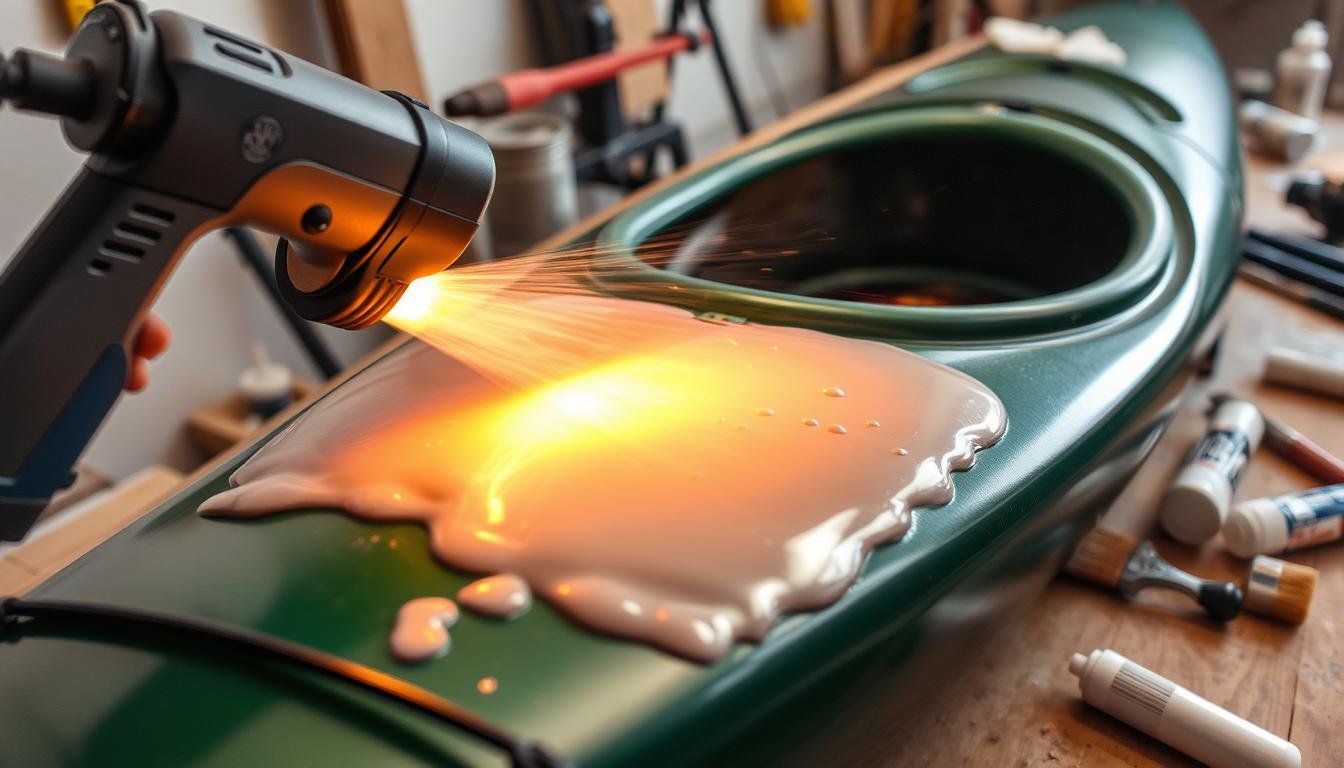
Using a Heat Gun to Cure Adhesives
Fixing inflatable kayaks can get a lot faster with a heat gun. It works by blowing hot air that melts the adhesive. This makes it flow into tiny cracks for a stronger bond.
Mechanism
The heat gun makes the adhesive, like epoxy or marine glue, softer. This lets it fill in the kayak’s surface better. It also makes the adhesive harden faster than usual.
Advantages
- Speeds up the curing time of adhesives, reducing the wait time for repairs.
- Helps the adhesive flow into small cracks and crevices, creating a stronger bond.
- Can be particularly useful when sealing seams or repairing the rib-to-rubber tubes on a kayak.
But, be careful with the heat gun. Too much heat can ruin the bond. Keep the right distance and temperature for kayak repair and other projects.
How to Use a Heat Gun on Inflatable Kayak Repair
A heat gun can help fix your inflatable kayak faster. But, you must use it right to not harm the fabric. Here’s how to use a heat gun for kayak repair, accelerated adhesive bonding, and inflatable boat maintenance.
Step-by-Step Guide
- Clean the repair area well on your inflatable kayak. This helps the adhesive stick better.
- Put a thin, even layer of heat activated sealants or glue on the area.
- Wait about 5 minutes for the adhesive to get sticky before heating it.
- Warm the area with the heat gun, moving it to avoid overheating.
- Watch for signs of overheating, like bubbles or color changes in the fabric.
- Hold the repair area in place while it cures to seal it well.
Heat Management
When fixing your kayak with a heat gun, manage the heat well. Use a low setting and keep the gun 6 inches away. Move the gun often to avoid overheating and damage.
Signs of Overheating
Watch the repair area for overheating signs. If the adhesive bubbles or the fabric changes color, stop the heat gun. Let it cool down. Overheating can ruin the repair, so watch closely and act fast.

By following these steps, you can use a heat gun to fix your kayak fast. Always be careful and watch the repair closely to avoid problems.
Speeding the Cure Time Without Heat Guns
Fixing inflatable kayaks or boats needs a quick adhesive cure. Not everyone has a heat gun. But, there are ways to speed up the cure without one.
Try using a hair dryer on low. It gives enough heat to cure the adhesive fast. But, keep it far and watch closely to avoid damage.
Another way is to let it cure naturally. This takes longer but is safer. It’s good for small kayak repairs. Just wait the time the maker says.
For DIY kayak patching or inflatable boat maintenance, try these methods. A bit of creativity and patience will get your boat ready for water.
“The key to successful adhesive curing for inflatable kayaks and boats is finding the right balance between time and temperature, without compromising the integrity of the materials.”
Tips for Speeding Adhesive Cure Time Without Heat Guns
- Use a hair dryer on a low setting to provide mild heat
- Allow the adhesive to cure naturally, following the manufacturer’s recommended time
- Ensure proper ventilation and monitor the area closely to prevent any issues
- Consider the type of adhesive and the size of the repair when determining the best approach
| Repair Item | Average Cost |
|---|---|
| High-pressure pump for inflatable paddle board | $129 – $150 |
| Pressure gauge for paddle board repair | $9 – $25 |
| Paddle board repair kit for inflatables | $50 – $100 |
| Epoxy resin for hard paddle board repairs | $10 – $20 per quart |
| Fiberglass cloth for hard paddle board repairs | $5 – $20 per yard |
| Sandpaper set for paddle board repairs | Under $35 |
| Disposable paintbrushes for epoxy application | $3 – $5 per set |
| Acetone for cleaning hard paddle board surfaces | $10 – $15 per gallon |
Does heat gun speed up adhesive cure time inflatable kayak
Using a heat gun to fix inflatable kayaks can be tricky. It might make the adhesive dry faster, but it can also harm the kayak if not careful. It’s all about knowing the right steps and following the instructions.
Some adhesives work better with heat, drying faster with a heat gun. But others might get damaged or change color if too hot. It’s crucial to check the adhesive’s needs before using a heat gun.
- Heat-curing adhesives can benefit from the use of a heat gun, as the targeted warmth helps the adhesive bond more quickly.
- Thermal-activated adhesives are specifically formulated to respond well to the application of heat, so a heat gun can be a valuable tool in these cases.
- However, if the adhesive is not designed for heat curing, using a heat gun could potentially damage the kayak material or weaken the bond over time.
Start with low heat and slowly increase it. Watch the repair area closely to avoid damage. This careful use of a heat gun can help fix your kayak faster.

Deciding to use a heat gun depends on the materials and adhesives. Always weigh the risks and benefits for a good repair.
What the experts say: Does using a heat gun save time?
Experts debate using a heat gun for fixing inflatable kayaks. It might speed up the adhesive cure time. But, it can also overheat the adhesive and harm the kayak if not used right.
Kayak repair pros say using a heat gun is hit or miss. It’s important to use it carefully and watch the repair area closely. They suggest following the adhesive’s instructions and looking for other ways, like a hair dryer, if a heat gun is risky.
Stan Orme, a home renovator and kayak builder, shared his thoughts.
“A heat gun can speed up curing, but be careful. Too much heat can weaken the bond and damage the kayak. Finding the right balance between speed and safety is key.”
Experts say the heat gun’s effect on inflatable kayak repair, heat curing adhesives, and accelerated adhesive bonding depends on the adhesive, kayak material, and the user’s skill. Managing heat well is crucial to avoid problems like bubbling, discoloration, or a weak bond.
Experts advise to weigh the risks and benefits of using a heat gun for kayak repair, thermal activated adhesives, and heat activated sealants. DIY kayak patching and outdoor gear repair might do better with methods like a hair dryer for a strong and lasting watercraft restoration.
Precautions When Using Heat for Curing
When fixing inflatable kayaks or other outdoor gear, be careful with heat-activated adhesives. Using a heat gun or hair dryer too much can cause problems. It might make the adhesive bubble, burn, or weaken, leading to leaks and damage.
To fix things right, watch the temperature closely and keep the heat moving. Look out for signs like discoloration or bubbling. If you see these, stop right away. Let it cool down before you continue, to avoid making things worse.
- Keep the heat source moving to prevent localized hotspots
- Watch for signs of overheating, such as discoloration or bubbling
- Stop immediately and let the area cool if any issues are detected
- Maintain proper heat management to ensure a successful and long-lasting repair
Managing heat well is important for inflatable kayak fixes or other outdoor gear restoration. By being careful, you can use heat to cure faster without harming the bond or your gear’s safety.

DIY vs Professional Repair
When it comes to fixing your inflatable kayak, you have two main choices: DIY or professional repair. The DIY method can save money for small fixes. But, getting a pro’s help has its own benefits.
Experts have the right tools and know-how for a solid fix. They know how to handle the special materials of inflatable kayaks. This means your repair will last longer and work better.
For does heat gun speed up adhesive cure time inflatable kayak, pros have better gear. This helps make the fix stronger and more reliable. This extra care can really help your kayak last longer.
Choosing between DIY and a pro depends on the repair’s size and complexity. For small fixes, DIY might be okay. But for big or tricky repairs, a pro is safer.
“The expertise and specialized equipment of a professional repair shop can make all the difference in ensuring a durable and long-lasting fix for your inflatable kayak.”
Think about the good and bad of each choice. This way, you can pick what’s best for your kayak. And make sure you can keep enjoying it on the water.
Conclusion
Using a heat gun for inflatable kayak repairs can be tricky. It can speed up the curing process, but it might also damage the kayak if not done right. Always follow the adhesive instructions and be careful with the heat.
Before using a heat gun, think about the risks and other options. You might use a hair dryer or get professional repair services. Keeping your kayak in good shape and fixing leaks quickly can avoid big repairs. But, knowing how heat helps with accelerated adhesive bonding is useful for DIY kayak patching.
By being careful with heat curing adhesives and aware of the risks, you can keep your kayak in great shape. This is true whether you fix it yourself or get help from outdoor gear repair experts.